
Let’s talk about how to make compost at home and how you can turn your kitchen scraps and yard waste into rich, dark compost that’ll make your Pacific Northwest garden thrive. Composting at home is a simple process that transforms organic materials like vegetable peels, coffee grounds, and fallen leaves into a valuable soil amendment that improves your garden’s health while reducing household waste.
The cool, wet climate of the Pacific Northwest creates perfect conditions for backyard composting. It’s probably easier to get started than you’d expect.
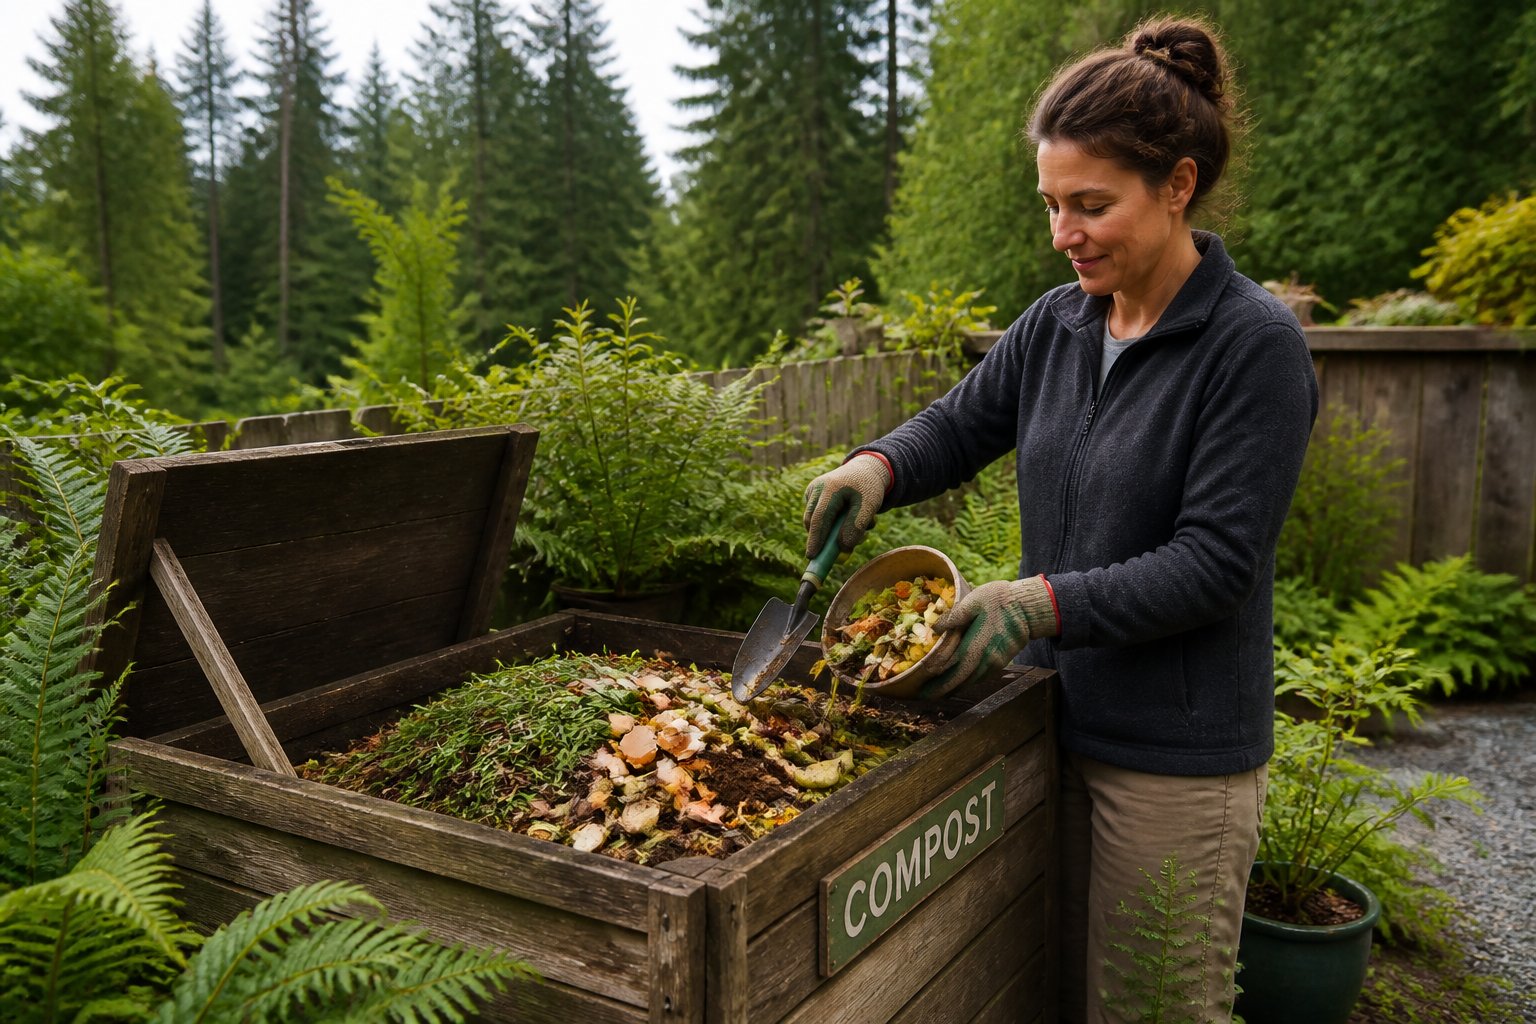
Whether you’ve got a tiny balcony in the city or a sprawling yard in the suburbs, there’s a composting method out there for you. This guide covers everything from what breaks down best to picking between hot composting, cold composting, and worm bins.
You’ll get tips to dodge classic headaches like bad smells and pests. And hey, you’ll end up with a steady supply of free fertilizer for your plants.
Making your own compost saves money on fertilizer and keeps a surprising amount of organic waste out of the landfill each year.
Once you get the hang of it, the process is pretty hands-off. The payoff? Genuinely better soil. Your plants will thank you for it.
Key Takeaways
- Composting turns kitchen scraps and yard waste into nutrient-rich soil amendment that improves garden health
- The Pacific Northwest’s cool, moist climate provides ideal conditions for successful home composting
- Multiple composting methods exist to fit any space from small apartments to large yards
Composting Fundamentals and Essential Concepts

Composting transforms organic materials into a valuable soil amendment through natural decomposition. If you know the basics. What goes in, what stays out, and why it matters. You’ll get better compost and fewer headaches.
The Science of Decomposition
Composting is the process of breaking down organic materials through microbial activity. Bacteria, fungi, and other microorganisms munch away at your pile, turning it into that dark, crumbly goodness.
Microbes need four things: carbon, nitrogen, oxygen, and moisture. Carbon comes from dry stuff. leaves, wood chips. Nitrogen is in your food scraps and grass clippings.
As the pile breaks down, it heats up. A well-managed pile can get surprisingly warm. 120°F to 150°F isn’t unusual. That heat’s actually pretty handy, since it kills off a lot of weed seeds and harmful pathogens.
If your pile doesn’t get enough oxygen, things go south fast. It’ll start to smell like rotten eggs. Give it a turn now and then to keep things fresh. You want it damp, not dripping. Think of a wrung-out sponge.
Benefits for Soil Health and Climate
Compost boosts soil health by adding organic matter, which really helps with structure and water retention. Working compost into your soil makes it lighter and easier to dig, and it drains better too.
Plants love compost because it’s full of nutrients. It’s also teeming with good microbes that help roots soak up what they need.
Composting reduces waste heading to landfills or incinerators. Every bucket of scraps you compost is one less in the trash.
Finished compost makes a solid mulch for garden beds. Spread it on top and you’ll conserve water, keep weeds down, and help stop erosion. It even keeps the soil cooler or warmer, depending on the season.
What Can and Cannot Be Composted
Getting the greens and browns right is key. Greens are high in nitrogen and give microbes energy. Browns are high in carbon and help with structure and moisture control.
Compostable materials include:
- Greens: vegetable scraps, fruit waste, coffee grounds, grass clippings, garden trimmings
- Browns: dry leaves, wood chips, sawdust, straw, shredded paper, cardboard
Do not compost:
- Meat, fish, or bones
- Dairy products
- Oils or greases
- Pet waste from dogs or cats
- Diseased plants
- Weeds with seeds (in slow compost piles)
Try for about two parts browns to one part greens by volume. Too wet? Toss in more browns. Too dry? Add some greens. You’ll get a feel for it pretty quickly.
Choosing the Right Composting Method for the Pacific Northwest

The Pacific Northwest’s mild, soggy winters and dry, warm summers are honestly perfect for several composting approaches. The right method comes down to your space, your patience, and what you want to compost.
Backyard Compost Piles and Bins
A basic pile or bin is plenty for most yards around here. You can do it yourself with wire mesh, wooden pallets, or cinder blocks. Most folks go for enclosed bins—they’re tidier and keep out raccoons and other critters, which is always a plus.
Bins work best if they’re at least 3 feet by 3 feet, but smaller ones will still do the job—just slower. Keep your bin somewhere shady or partly shaded so it doesn’t dry out in the summer.
Different composting systems handle different amounts of material. Wire bins with hardware cloth on the bottom can keep rodents out. Wooden bins last a few years and look like they fit in the garden.
Plastic bins from garden stores are good at holding in moisture, especially during those rare dry spells.
Hot Composting vs. Cold Composting
Hot composting means your pile heats up to about 135°F if you do it right. You’ll need a decent pile (about a cubic yard), and you’ll have to turn it every 5–10 days. But you’ll get finished compost in about a month or two, and most weed seeds and plant diseases are toast.
Mix equal parts greens and browns, and keep it as damp as a wrung-out sponge. It’s a bit more work, but it’s worth it if you’re impatient.
Cold composting is more hands-off. Just add stuff as you have it and let nature do its thing. It’ll take longer—six months to a year—but you don’t have to fuss over it. Cold piles won’t get hot enough to kill off diseases or tough weed seeds, so don’t add them if possible.
During the rainy season, cover your pile so it doesn’t get waterlogged. A tarp or plastic sheet works fine. Cold composting is great if you’re busy or just not that into turning piles.
Compost tumblers are a nice in-between. They’re easy to turn and keep pests out. Give them a few spins each week and you’ll get compost without much mess.
Worm Composting and Vermicomposting
Worm composting (vermicomposting) is surprisingly easy and works year-round, indoors or out. Red wigglers (Eisenia fetida) gobble up kitchen scraps and turn them into rich castings way faster than regular compost piles.
You can buy or build a worm bin. Just make sure it’s got good airflow and drainage. Lay down shredded newspaper or cardboard as bedding, add your worms, and bury food scraps under the bedding. Keep it between 55°F and 75°F if you can.
Worms don’t like citrus peels, onions, or garlic in big amounts, but they love coffee grounds, veggie scraps, and eggshells. The Pacific Northwest’s mild weather makes it easier to keep bins at the right temp than in places with wild swings.
Every few months, push the finished compost to one side and add fresh bedding to the other. The worms will move over, and you can scoop out the good stuff.
Alternative and Indoor Composting Options
Bokashi systems are a bit different. They ferment food waste indoors using bran with special microbes. You can even compost meat, dairy, and oily foods (which regular piles can’t handle). The sealed bucket keeps smells in check and fits under most sinks. After two weeks, bury the fermented stuff in your garden or toss it into a regular compost bin.
Trench composting is old-school but effective. Dig a trench 12–18 inches deep between garden beds, drop in leaves and chopped plant bits, and turn it into your beds in the spring. It’s a low-effort way to feed your soil if you don’t want a separate pile.
Sheet mulch composting is basically lasagna gardening. Layer browns and greens right on the ground to start new beds. Cover grass with cardboard, then alternate leaves, kitchen scraps, and straw. By spring, you’ll have fluffy, ready-to-plant soil.
For indoor composting, there are countertop electric composters that dry and grind food scraps in just a few hours. They’re handy for apartments or if you don’t have outdoor space, though the end product isn’t quite the same as classic compost.
Step-by-Step Guide on How to Make Compost at Home
Getting started is about balancing what you add, keeping it damp, and handling little issues as they pop up. Once you’re rolling, turning food scraps and yard waste into finished compost is pretty easy.
Collecting and Managing Greens and Browns
To begin, you’ll need to gather two main types of material. Greens are nitrogen-rich. Think food scraps, fresh grass clippings, and even manure (if you’re up for it). Carbon-rich browns include dried leaves, cardboard, wood chips, and similar materials.
Keep a small container on your kitchen counter for veggie peels, coffee grounds, and eggshells. Stash your browns in a bin or pile close to your compost area for easy access.
Aim for two to three times more browns than greens as you build your pile. Too many greens? Things get soggy and stinky. Too many browns? The pile slows down and takes forever.
Chop or shred stuff to speed things up. Cut food scraps into chunks, shred cardboard and newspaper, and break up sticks or woody stems.
When fall hits and leaves are everywhere, store some extra browns. You’ll be glad to have them when your kitchen scraps start piling up midwinter.
Layering, Moisture, and Aeration Best Practices
Start your compost pile with a layer of browns at the bottom, about 4 to 6 inches deep.
Add a thin layer of soil to introduce beneficial microorganisms.
Place a layer of greens on top, then another thin layer of soil.
Keep alternating brown and green layers until your pile is at least 3 feet high and 3 feet wide.
This size helps the pile heat up enough for proper decomposition. Trust me, it matters.
Water each layer as you go so the pile feels like a damp sponge when squeezed.
If things seem dry, add water. If it gets soggy, add more browns.
Turn your compost pile every week or two using a pitchfork or shovel.
Move the center materials out and the edges in. This adds oxygen and speeds things up.
The pile should heat up to somewhere between 110°F and 140°F when it’s working properly.
If you don’t want to turn the pile as often, punch holes in the sides with a stick or pipe to boost airflow.
Troubleshooting Common Compost Problems
If your compost smells like ammonia or rotten eggs, you probably have too many greens.
Mix in dry leaves, shredded paper, or sawdust to soak up moisture and add carbon.
If your pile isn’t heating up, it needs more nitrogen.
Add fresh grass clippings, food scraps, or a bit of composting manure to get things going again.
Common Issues and Solutions:
| Problem | Cause | Solution |
|---|---|---|
| Slimy, wet pile | Too many greens | Add browns and turn the pile. |
| No heat | Too many browns or piles are too small. | Add greens and water. |
| Attracts pests | Exposed food scraps | Bury scraps in the center of the pile |
| Dry and not breaking down | Not enough moisture | Add water while turning. |
Keep meat, dairy, and oils out of your pile if you don’t want to invite rodents.
Bury food scraps in the center, not on top.
In the Pacific Northwest, cover your pile during heavy winter rains to keep it from getting waterlogged.
Composting does slow down in winter, but as long as it stays above freezing, things keep moving.
Knowing When Compost Is Finished
Finished compost looks dark brown or black and feels crumbly.
It should smell earthy and pleasant, not sour or funky. You shouldn’t be able to recognize what went in it.
For hot piles you turn regularly, the process takes about 2 to 6 months.
Cold piles? More like 6 to 12 months, sometimes longer.
Grab a handful and squeeze. It should hold together but break apart easily when poked.
If it feels too wet, let it air out for a few days.
Screen your compost through hardware cloth or a mesh to pull out big chunks that need more time.
Then toss them back into the active pile.
Use finished compost right away or store it in covered bins so it doesn’t dry out.
Spread it on your garden beds, mix it into potting soil, or use it as mulch around your plants.
Effective Application and Advanced Tips
Finished compost is basically garden gold if you use it right.
Pacific Northwest gardeners can get even more out of it with a few smart tricks and local resources.
Using Compost as a Soil Amendment
Mix your finished compost into the top 6-8 inches of garden soil before planting.
For veggie beds, spread 2-3 inches and work it in with a fork or tiller.
For established plants, just lay down a 1-2 inch layer around the base as a top dressing. No need to dig it in—let the rain do the work.
Compost also makes a great mulch. Spread it 3-4 inches thick around trees, shrubs, and perennials, but keep it a couple inches away from stems.
The mulch layer keeps weeds down, holds moisture, and keeps feeding the soil as it breaks down.
Apply compost in spring before planting or in fall so it can settle in over winter.
The Pacific Northwest rain will help move the nutrients down into the soil.
Common Composting Resources and Local Supplies
Pacific Northwest gardeners have access to plenty of composting resources and supplies through local programs.
Many cities offer discounted compost bins.
County extension offices run free workshops and help troubleshoot if you’re just starting out.
Need browns? Local tree services or municipal yard programs often have wood chips.
Coffee shops usually give away used grounds, which are great for nitrogen.
Local farms sometimes sell or even give away aged manure to help your pile decompose faster.
Garden centers carry bins, aerators, and thermometers built for our climate.
Advanced Techniques: Compost Tea, Biochar, and Cover Crops
Compost tea is a liquid fertilizer made by steeping finished compost in water for a day or two.
Fill a 5-gallon bucket with water, add 2-3 cups of compost in a mesh bag, and stir now and then.
Spray it on plant leaves or water it into the soil for a quick boost.
Biochar or charred wood can improve compost quality if you add about 5-10% by volume.
It holds moisture and nutrients, plus gives good bacteria a place to live.
Plant cover crops like crimson clover or winter rye in the fall.
Chop them down in spring and toss the green material right into your compost pile. For free, nitrogen-rich material and better soil.
Frequently Asked Questions
New composters usually wonder about the basics: how to start, how to manage the pile, and when it’s ready to use. The truth is, the answers depend on your setup, your climate, and how much time you want to put in.
How do I set up a simple home composting system for the first time?
You really just need three things: a container or spot, organic materials, and knowing what to put in it.
Pick a spot in your yard that drains well and gets some sun, preferably not blazing hot all day sun.
You can buy a compost bin, build a simple wood structure, or just make a pile. Whatever fits your space and style.
Backyard composting works with bins or open piles, so don’t overthink it.
Start with a base of browns—dry leaves or small twigs about 4-6 inches deep for drainage and airflow.
Alternate layers of greens and browns as you add them.
Keep a container with a lid in your kitchen for food scraps, and empty it outside every few days so your kitchen stays fresh.
What kitchen scraps can I compost, and what should I keep out of the pile?
Compost fruit and veggie scraps, coffee grounds with filters, tea bags, eggshells, and even bread or grains.
These break down quickly and give your pile a nitrogen bump.
Never add meat, fish, bones, dairy, or oils. They attract pests and stink things up!
Never use fat, oils, or grease.
Skip pet waste, diseased plants, or weeds that have gone to seed. That stuff just creates problems later.
And don’t forget to peel off those little stickers on produce—they never break down and will show up in your finished compost.
What is the ideal balance of greens and browns for reliable composting?
Aim for about three parts browns to one part greens by volume.
Browns are carbon-rich: dry leaves, straw, sawdust, shredded paper, and cardboard.
Greens are nitrogen-rich: fresh grass clippings, food scraps, coffee grounds, and plant trimmings.
Too many greens and your pile gets wet and smelly. Too many browns, and it slows way down.
Don’t stress about measuring—just watch your pile.
If it smells or looks slimy, add browns. If it’s cold and not breaking down, add greens.
Layer your materials as you go, or mix them when you turn the pile. Either way works fine.
How can I speed up composting and produce finished compost faster?
Chop or shred stuff before adding it. Smaller pieces break down faster.
Turn your pile every week or two with a pitchfork or shovel to get airate it.
Hot composting with regular turning can produce finished compost in weeks instead of months.
Keep the pile moist, like a wrung-out sponge. If it dries out, just spray it with a litte water.
Build a pile that’s at least 3 feet wide and 3 feet tall. Bigger piles stay hotter and break down faster.
How do I manage compost in a wet, cool climate without it getting soggy or smelly?
Cover your pile with a tarp or lid during heavy rain to keep it from getting soaked.
Or, put your bin under a tree or overhang for a bit of shelter.
Add extra browns in wet weather to soak up moisture.
Keep a stash of dry leaves, shredded paper, or sawdust handy for rainy spells.
Turn the pile more often in cool, wet conditions to keep air moving and prevent bad smells.
Good airflow keeps the helpful bacteria working.
If you want less hassle, use a covered bin with ventilation holes. Keeps rain out, lets air in.
How do I know when compost is finished and ready to use in the garden?
Finished compost usually looks dark and crumbly, kind of like really good soil. You shouldn’t really be able to spot the original stuff you tossed in, except maybe a few stubborn woody bits here and there.
It should smell earthy and pleasant, not sour or weirdly rotten. If the pile’s cooled down to match the air temperature and doesn’t heat up again after turning, that’s a good sign.
The whole thing shrinks a lot—down to about a third of what you started with. Seriously, a full bin turns into way less finished compost than you’d expect.
Want to be sure? Try planting a few seeds in a small scoop of your compost. If the seeds sprout and look happy, you’re good to go. If nothing happens or the seedlings look sad, just let the pile sit a bit longer.
